
Welcome to Our Help Desk.
You will get all the detailed information for your queries related to our Shopify apps.
-
Dashboard

-
Basic about Stores locators
-
Different Settings
-
Text & translations
-
Other
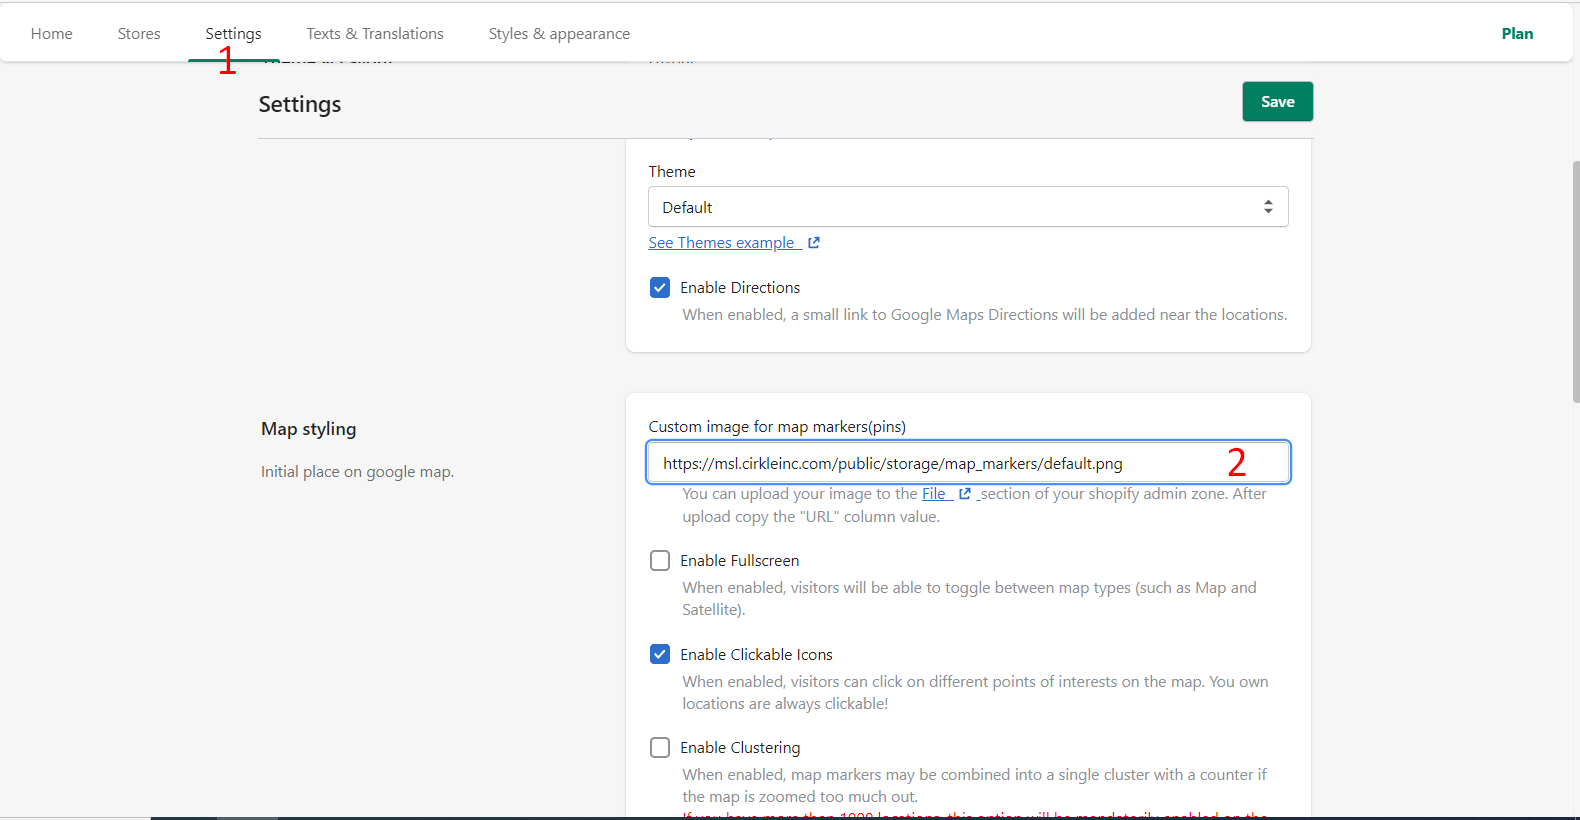
Map Styling
 6062 Views
 July 07, 2021
– You can easily choose your own custom Pin. Just upload your pin on the files under settings. Copy the image URL and paste it here.
Different settings like:
- Enable Fullscreen
When enabled, visitors will be able to toggle between full-screen maps. - Enable Clickable Icons
When enabled, visitors can click on different points of interest on the map. Your own locations are always clickable! - Enable Clustering
When enabled, map markers may be combined into a single cluster with a counter if the map is zoomed too much out. - Enable Map Type Control
When enabled, visitors will be able to toggle between map types (such as Map and Satellite). - Enable Zoom Control
When enabled, This control will be visible and appear near the bottom right of the map. - Enable Scale Control
When enabled, visitors will see a simple map scale(on the bottom right of the map). - Enable StreetView Control
When enabled. users will be able to activate Street View Panoramas. - Market Height and width
Set your pin height and width. - Custom JSON for MAP styling
https://mapstyle.withgoogle.com
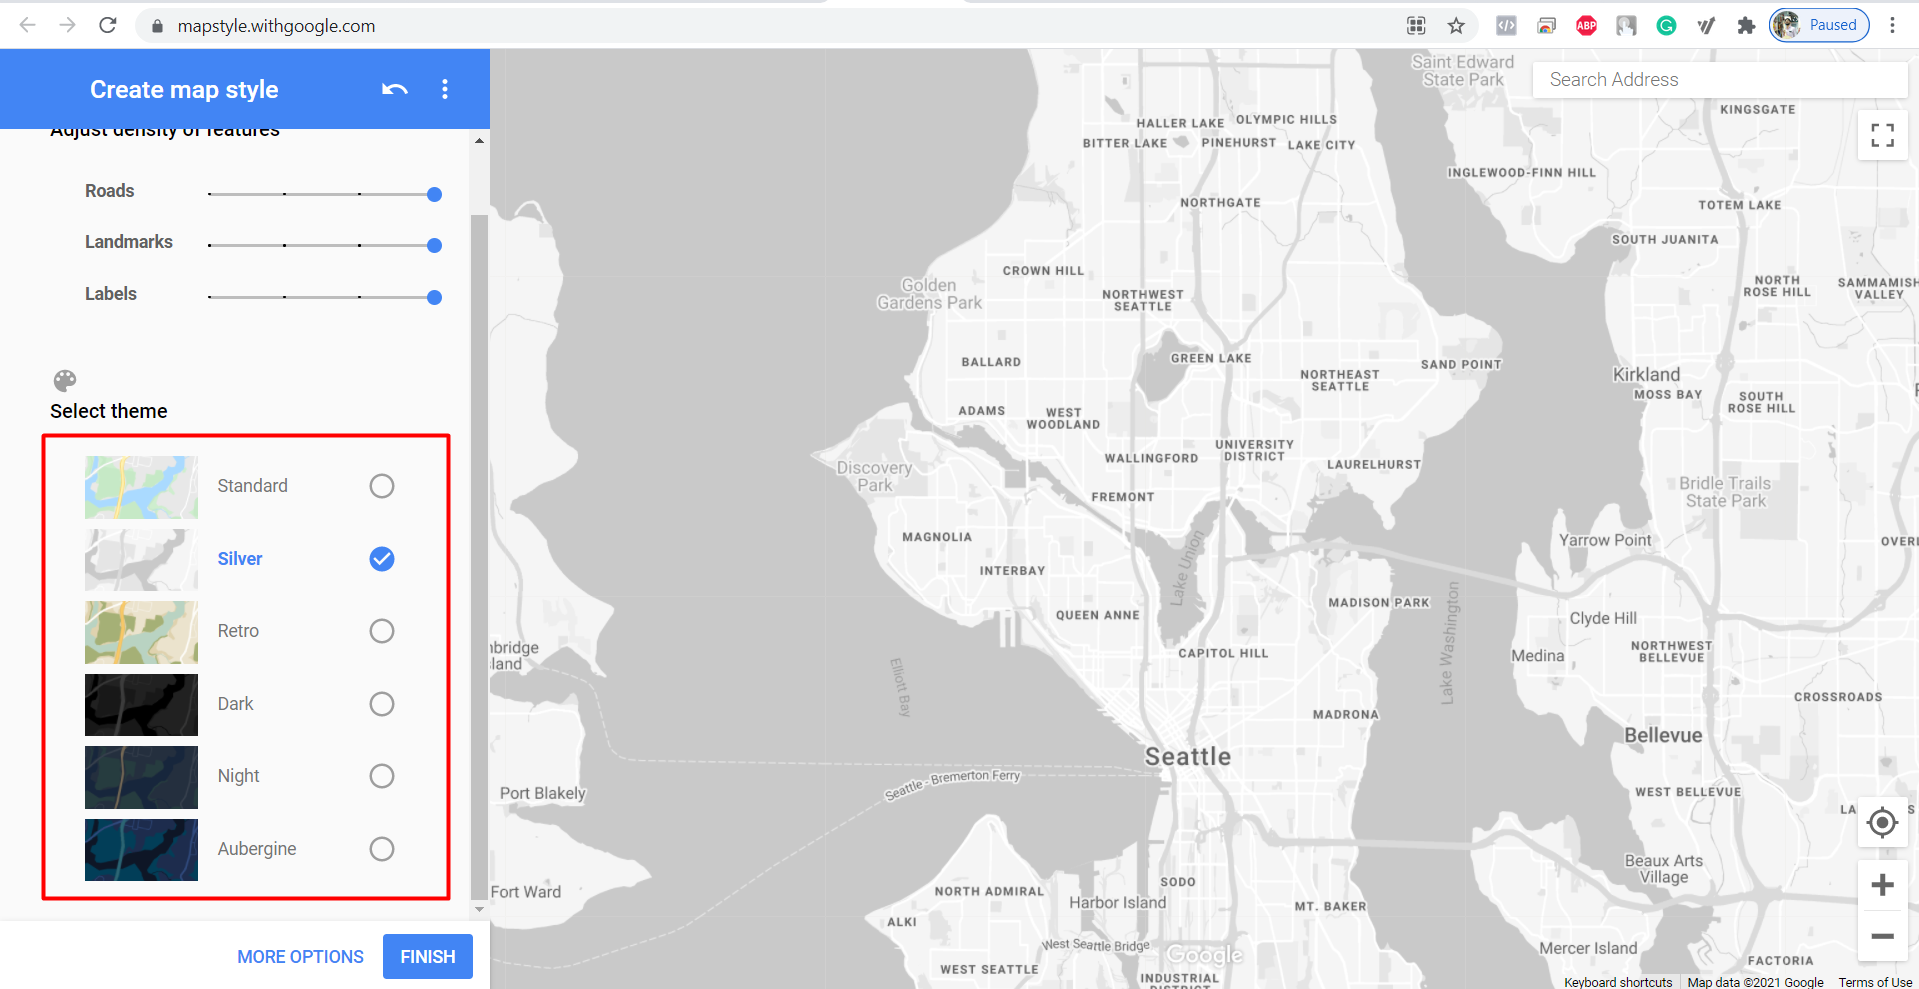
How to create a design JSON for MAP?
Step 1: Select your design from here.
Step 2: Click on the Finish Button and in the popup you can see the JSON data.
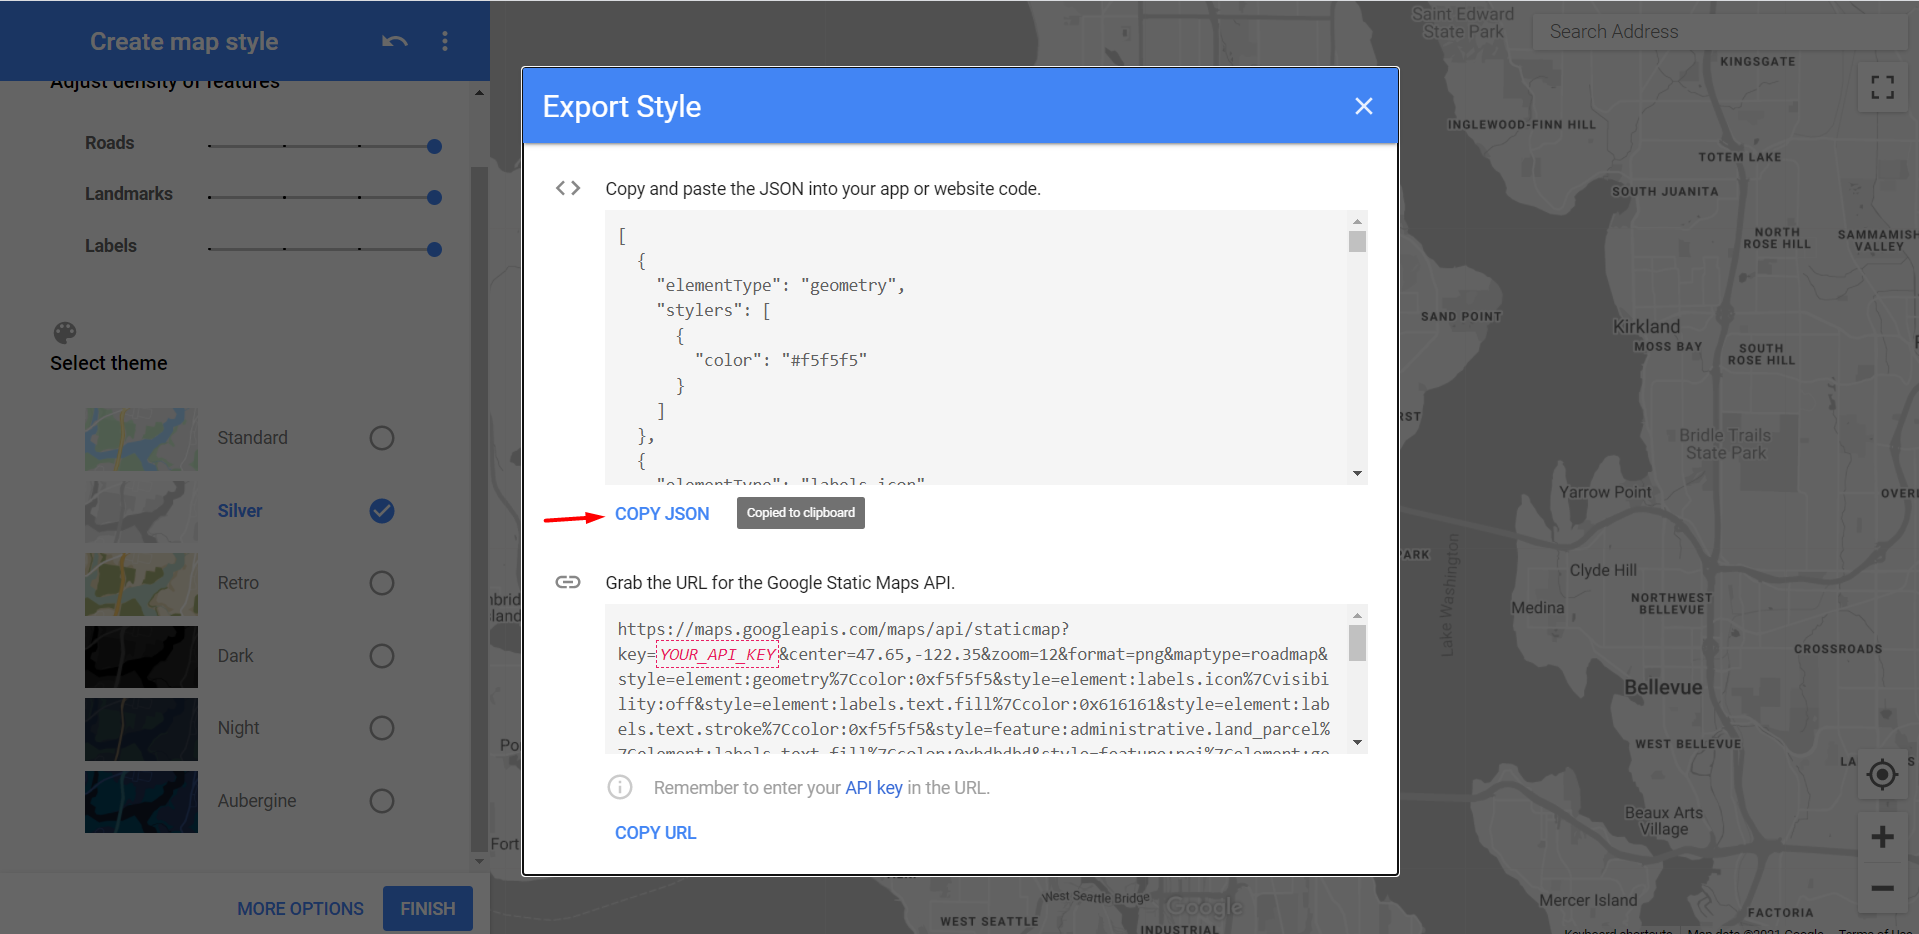
Copy it and paste it on
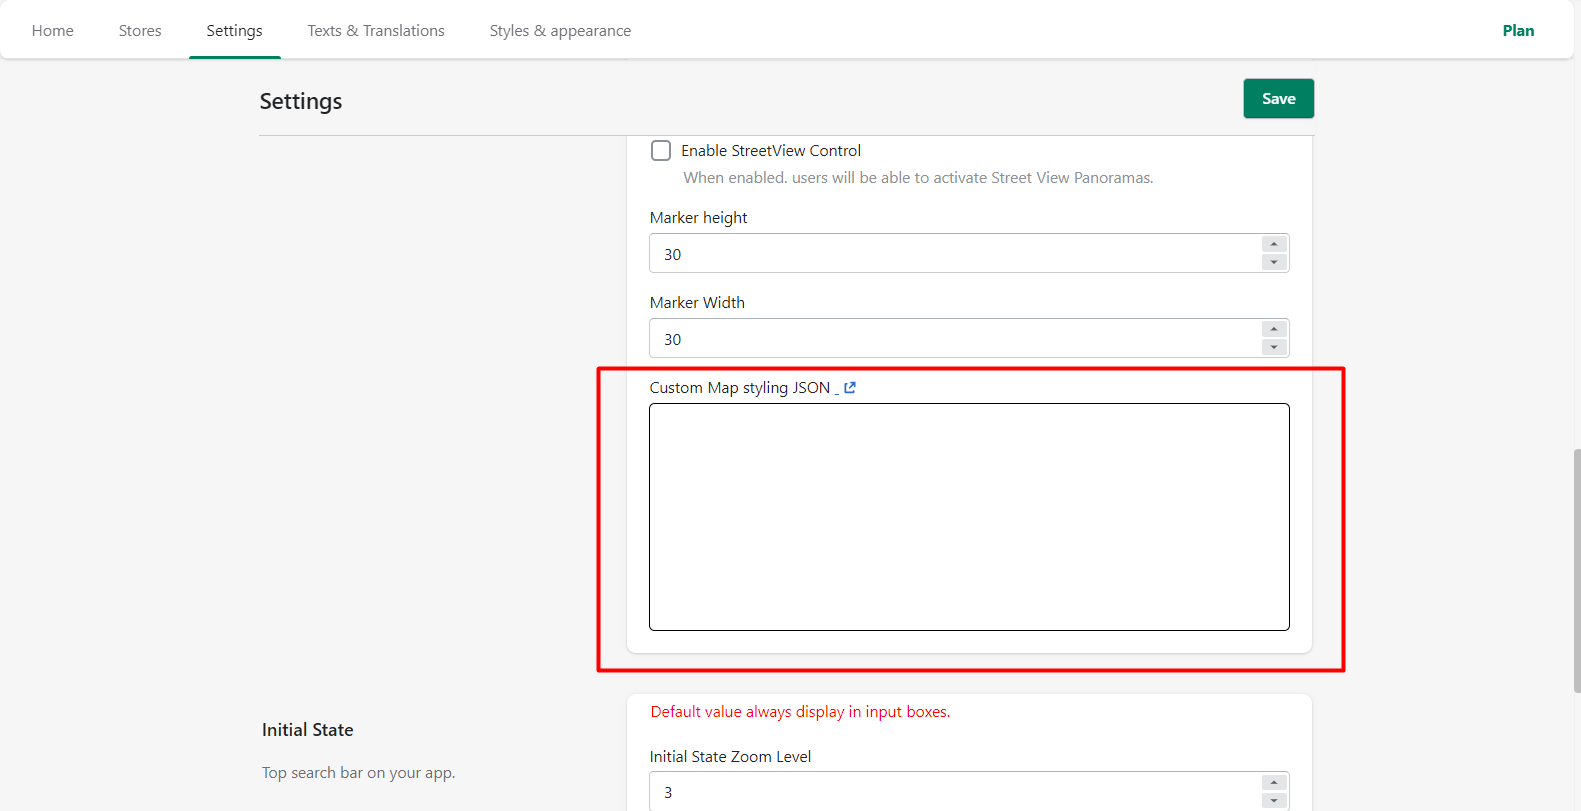
Now the map is displayed with the new styling.